You can adapt the statuses of your issues to the way your team works. This article shows you how to rename, describe, add, sort and delete statuses.
Prerequisites
- You are the team owner of the team whose statuses you want to customize
- Status sets are team-specific and defined per issue type. Changes don't affect other teams.
Step-by-step
- In the team you want to configure, open the Issue types area.
- Click the gear icon next to the issue type you want to customize.
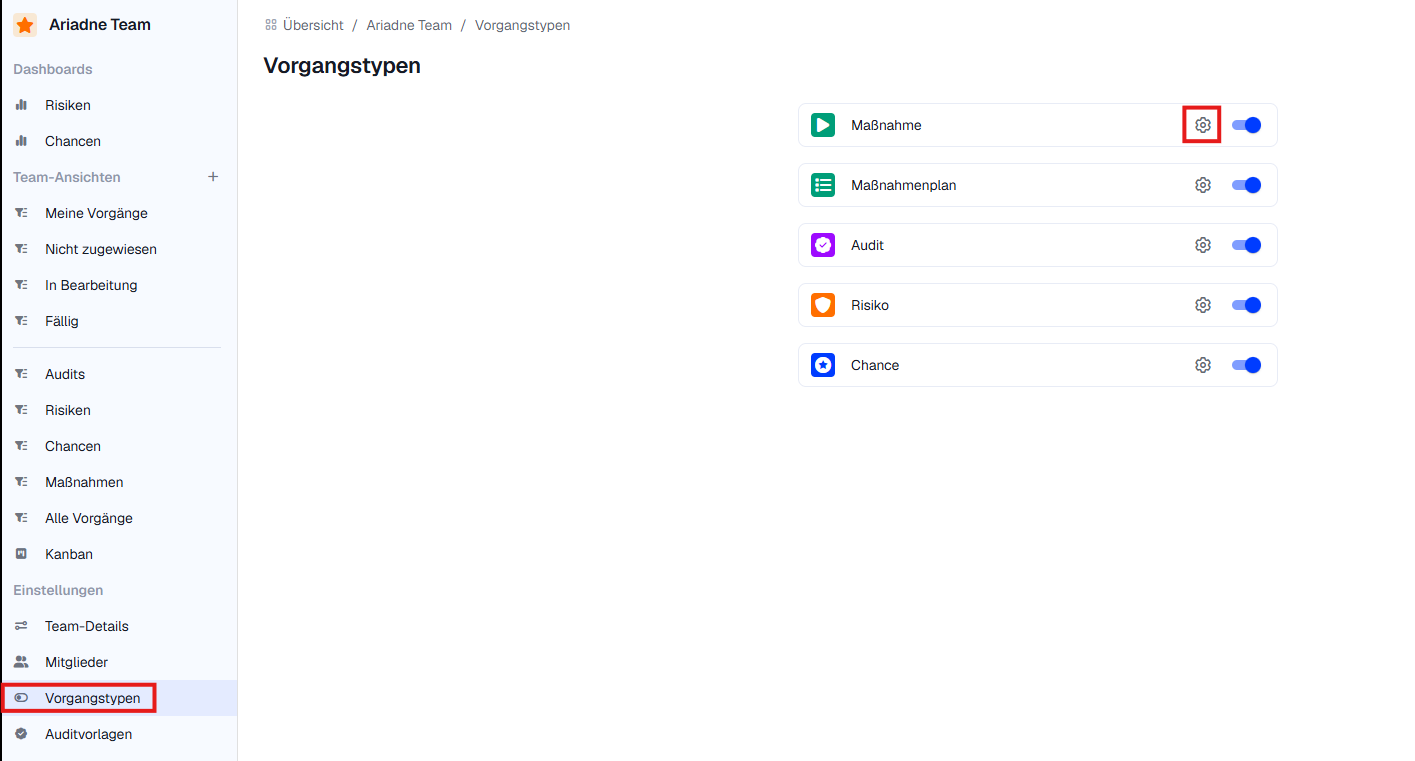
The settings show all statuses of this issue type. This is where you make the following changes.
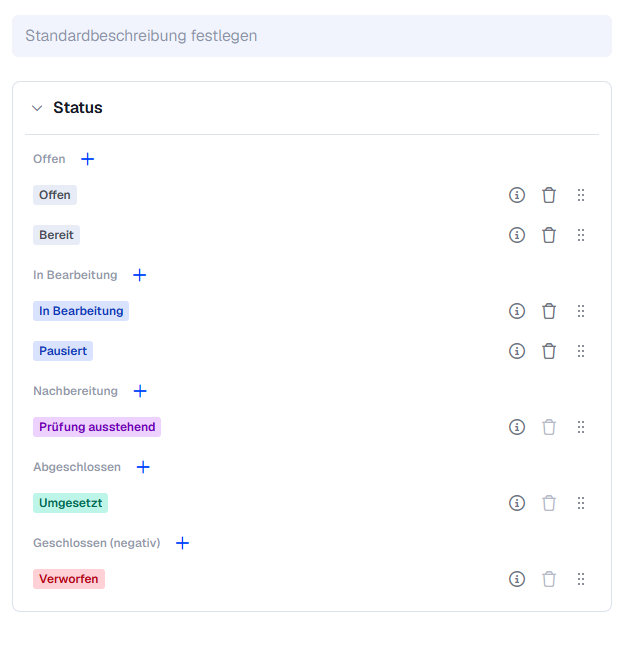
Rename a status
- Click the status you want to rename.
- Enter the new name. Your change is saved automatically.
Add a status description
- Click the info icon next to the status.
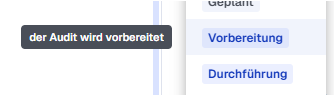
- Enter a description, e.g. when an issue should move to this status.
The description is shown as a tooltip when someone hovers over the status.
Add and sort statuses
- Click the plus icon to add a new status.
- Enter a name for the new status.
- Drag and drop the status to the position you want.
Delete a status
You can delete statuses you no longer need.
Important: If the status is already in use, you need to assign the affected issues to a different status before you can delete it.
Result
The issue type now uses your customized statuses in your team. Descriptions appear as tooltips, so everyone on the team knows what each status means.
Related articles
Was this article helpful?
That’s Great!
Thank you for your feedback
Sorry! We couldn't be helpful
Thank you for your feedback
Feedback sent
We appreciate your effort and will try to fix the article